CREATE A FROZEN TEXT EFFECT WITH ICE PARTICLES IN PHOTOSHOP
Here is a preview of the final effect I have for this tutorial: (click to enlarge)
Note: if you have difficulty with Step 3 and 4 of this tutorial, check out this video tutorial below:
Step 1
Create a new document sized 700px * 1120px with black background, load one of this ice texture from the texture pack we download into Photoshop. Use the rectangular tool to select a portion from the it:

Copy and paste the selection onto our document (resize if necessary), apply the following “Dry Brush” filter setting to it:

and you will have the following effect so far:

Erase the following area with a soft eraser:

Step 2
Add the following adjustment layers on top of this texture layer:
Selective Color


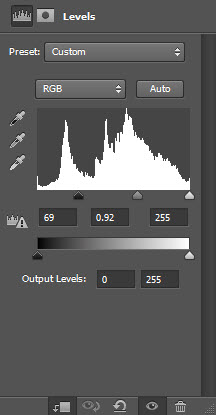
Levels
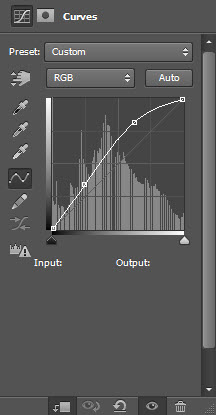
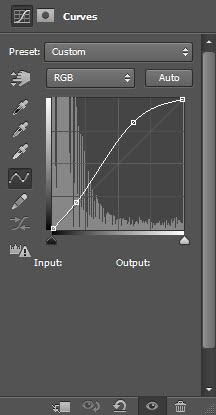
Curves
and you will have the following effect:

Step 3
Type a letter at the centre of the canvas:

We will add some ice texture onto the text – choose the Polygonal Lasso Tool:

Select a portion as shown below:

Copy and paste the selection onto the texture, rotate and resize the selection as shown below:

Duplicate this layer a few more times, resize and combine them together as shown below:

Merge the duplicated layers, then move them to the right and centre of the text:

Go back to the original text layer and use a soft eraser to remove some parts of it, so it doesn’t have the hard edges any more:

Step 4
Merge all these icy texture layers, then apply the following layer blending options to this merged layer:
Bevel and Emboss
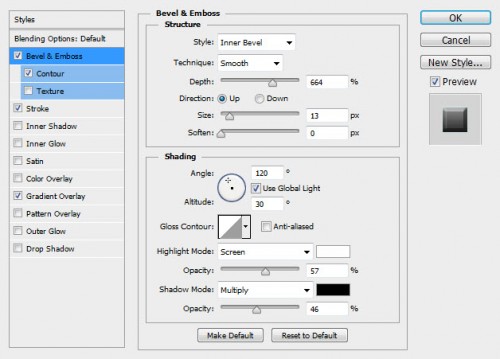
Contour

Stroke
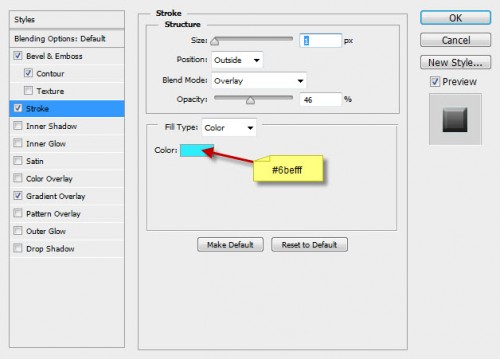
Gradient Overlay

and you will have the following effect:

Step 5
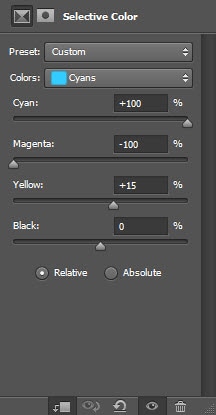
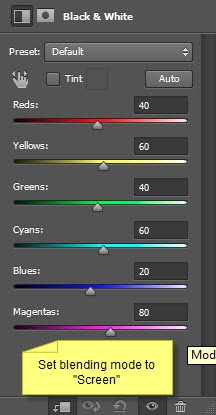
Add the following adjustment layers as clipping mask to this merged texture layer:
Selective Color


Black and White
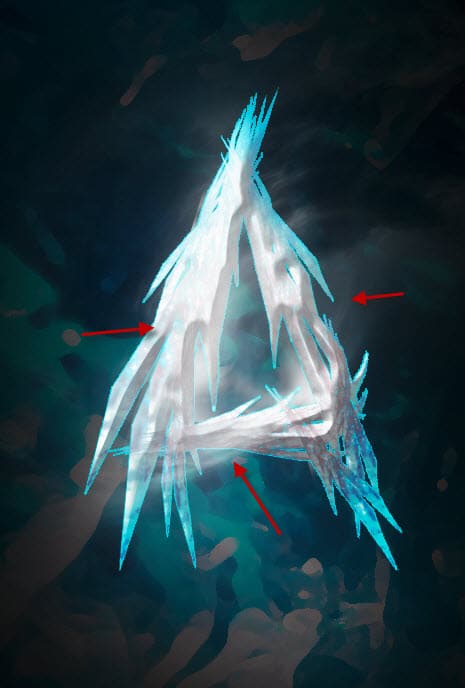
And you will have the following effect:
Step 6
We will add some particle effect to this text. Load another “Ice-02-by-lilystox” texture into Photoshop and use a 30px feathered Lasso Tool to draw a small selection as shown below:

Copy and paste the selection over to our document, resize and change the blending mode to “Overlay”. Duplicate this layer twice and move them to different parts of the text as shown below:

We’re almost done! Flatten the image and duplicate the background layer, use the liquify filter too to add some flowing effect as shown below on this new layer:
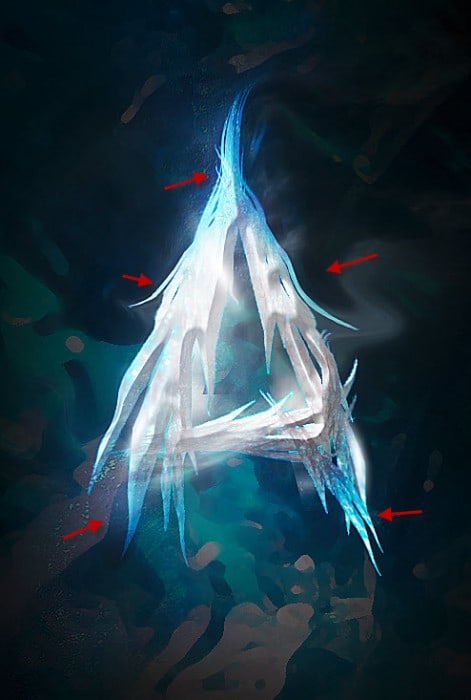
I added the following 2 adjustment layers to fine-tune the colours:
Color Balance


Curves
and you will have the following final effect: (click to enlarge)

That’s it for this tutorial! Hope you enjoy it and find it useful! Till next time, have a great day!


