Archive for 2014
Design a Paint Splashing Effect Into Your Image
Design a Paint Splashing Effect Into Your Image
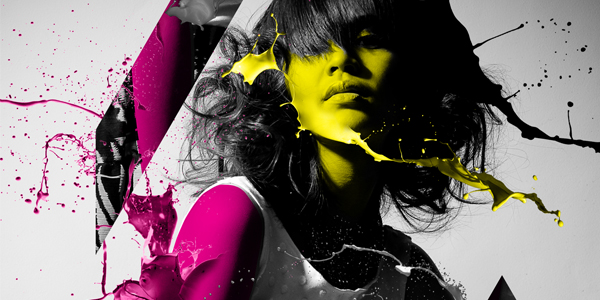
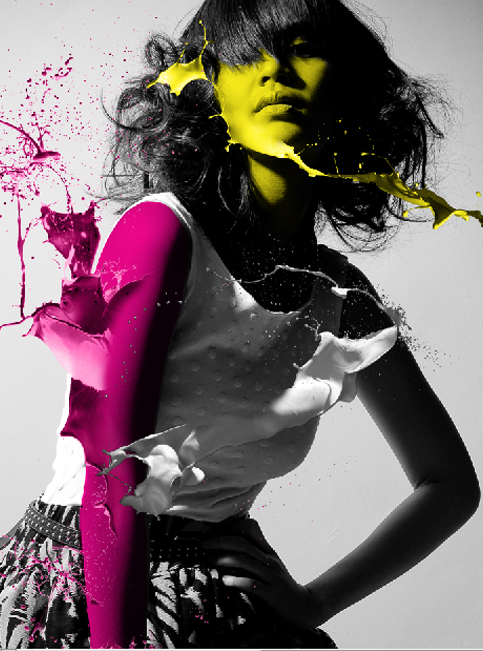
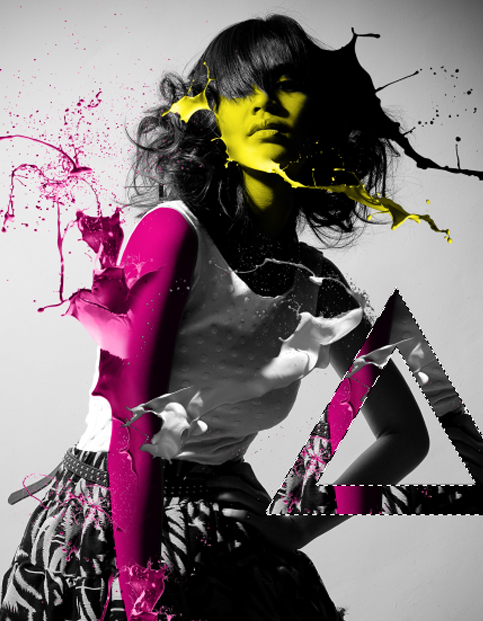
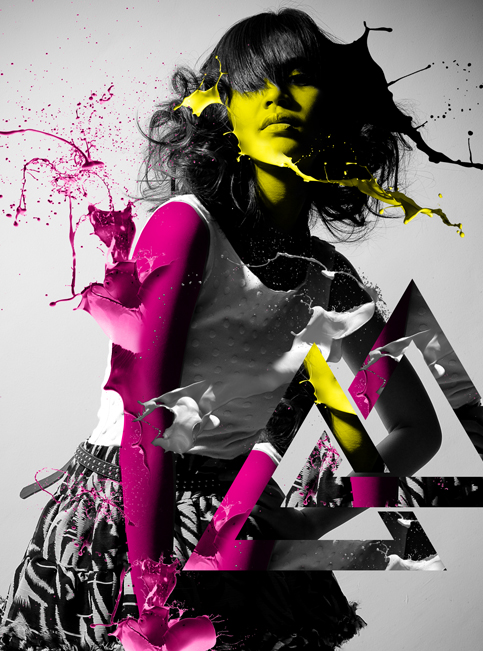
Final Preview
Part 1
Open the “base-image_by-camille-cordero.jpg” image and name this layer “Base Image”.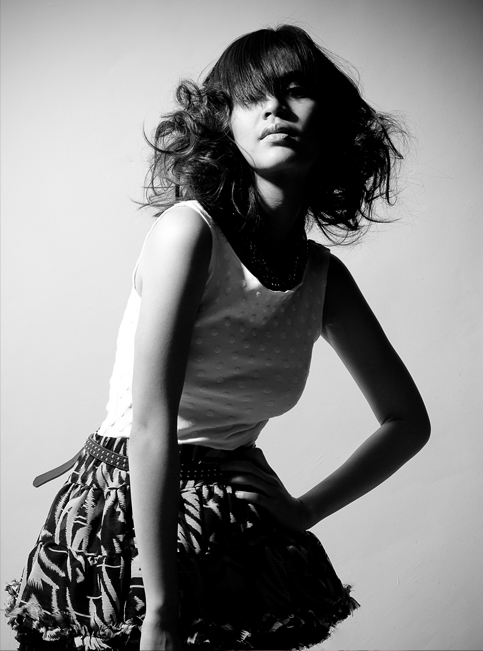
Part 2: Body Painting
Create a new layer (Shift Ctrl+N) and name it “Body Paint”. Set the Layer Blend Mode to “Multiply”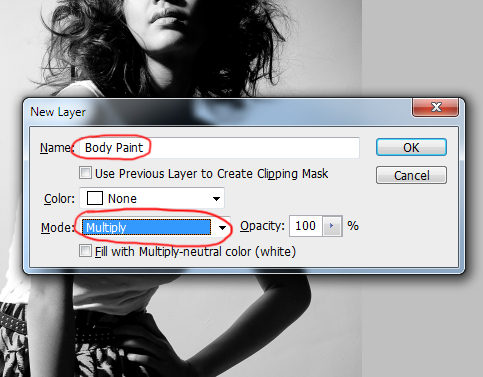
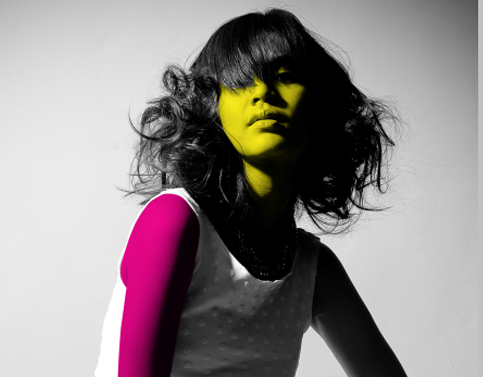
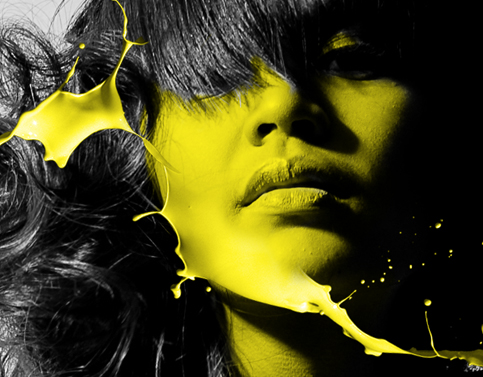
We are going to start off by using a brush to paint the face and the left arm of the base image.
First select the brush tool and choose a soft rounded brush. Make the size according to your preference.
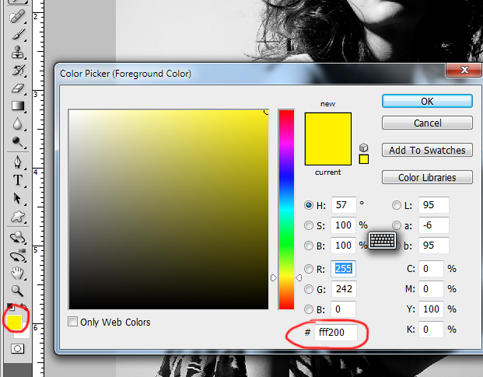
After that change the foreground color to #fff200.
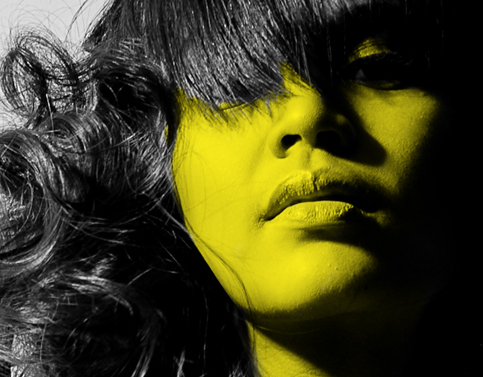
Now we are ready to paint. Start off with the face and the neck first. In this step feel free to zoom in and zoom out and change the brush size according to your needs.
Note: Keyboard shortcuts are very handy in this step. The keyboard shortcut for zooming in is Ctrl+ and zooming out is Ctrl -. To change the brush size, you can use right bracket sign “]” to increase your brush size and left bracket sign “[“ to make it smaller.
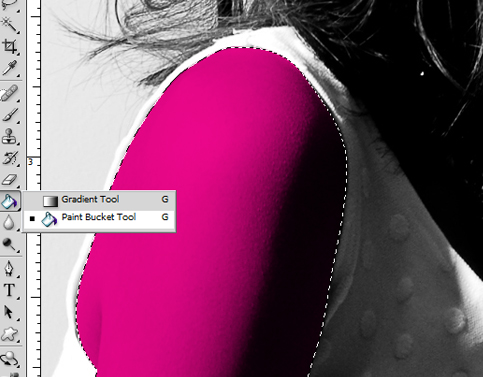
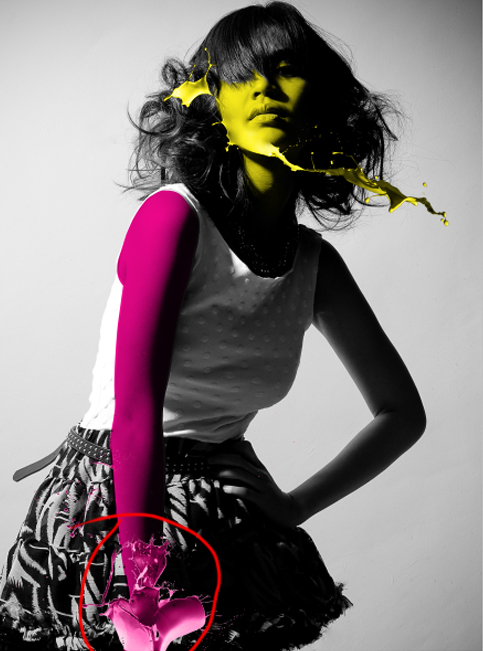
Now we are going to do the left arm but first change the foreground color to “#ec008c”
Choose the Pen tool and trace around her arm.
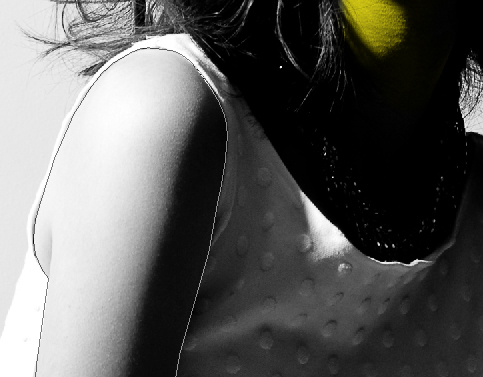
After you are done tracing, press Ctrl+Enter, this will make a selection. The blinking dashed-lines (marching ants)
will appear.
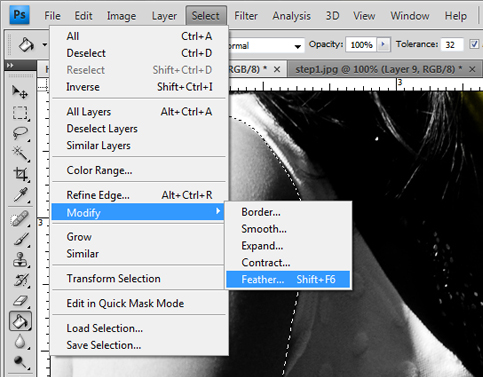
From the menu bar, choose Select>Modify>Feather and choose 0.5, then click OK. (if your using CS3 click Ctrl+Alt+D to show feather option.)
Now choose the paint bucket tool (G) and click on the selected area then press Ctrl+D to deselect.
Part 3: Adding the Paint Toss
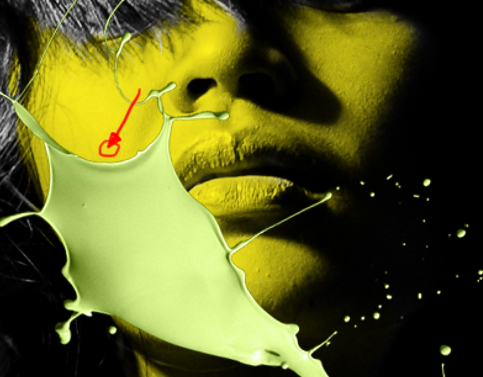
Now lets get wet and toss her the paints! (Please remember this part since we will use this technique in the succeeding part).Open number nine paint toss from the media militia paint tossing pack. Drag this to you working document. Use the magic wand to select the black in this image. Press delete to remove the background.

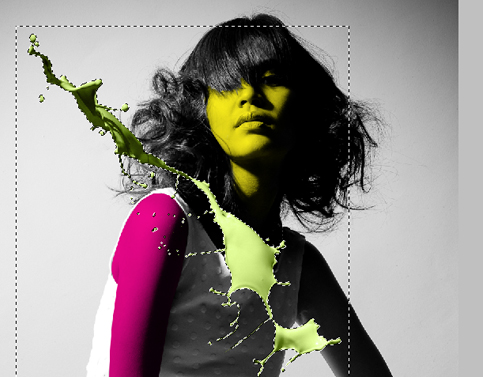
Press CTRL+D to deselect the selection. Name this layer “face toss” and position the orientation of the paint (ctrl+T) like shown below:
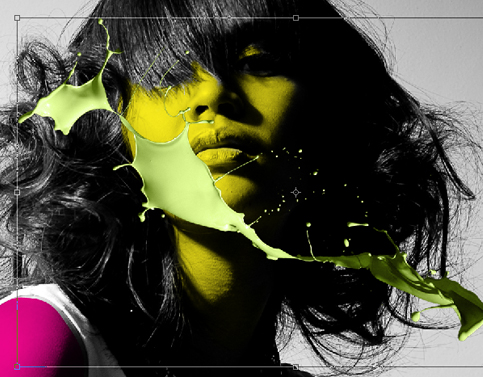
Now we will blend this paint to the color of her face.
a. first select the eyedropper tool (I).
b. then click the area of the face shown below:
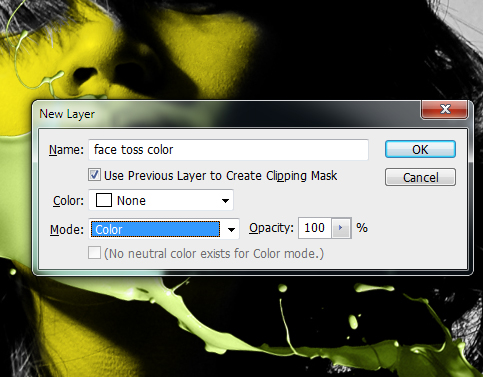
Create a new layer (shift+ctrl+N) and name it “face toss color”, check the “use previous layer to create clipping mask” and change the blending mode to “color”.
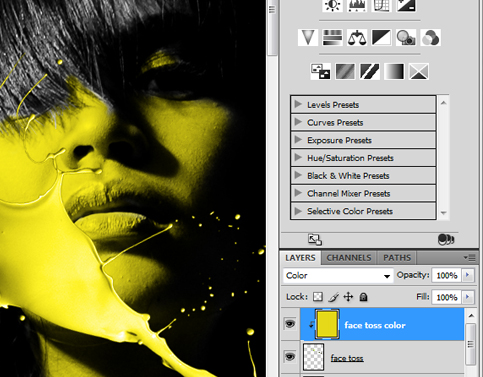
Now while your still in the “face toss color” layer, use the paint bucket tool (g) and click it into the artboard to recolor the paint toss so we can match it on the color of the face.
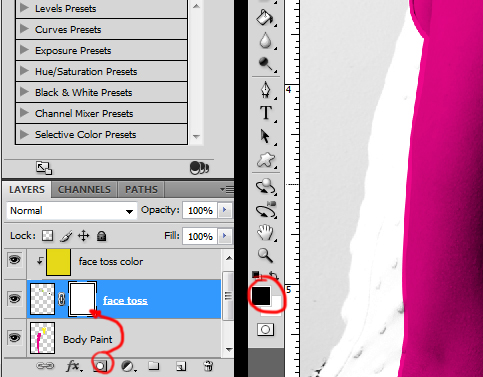
Now, we will erase some parts to complete the blending of the paint to its face.
Go to the “face toss” layer, then click the “add vector mask icon”, then change your foreground color to “black”.
Then using a soft brush tool, (while the vector mask is selected) paint over the area you want to erase, to achieve similar result like the one below:
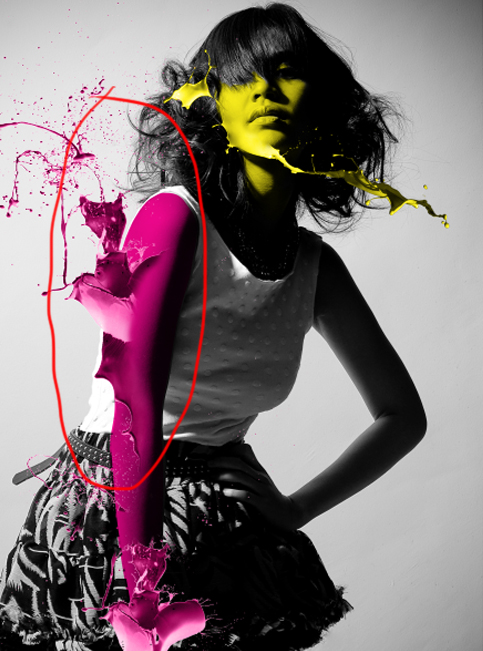
Now, with the same process, do this on the left arm using the file “paint toss no.16“
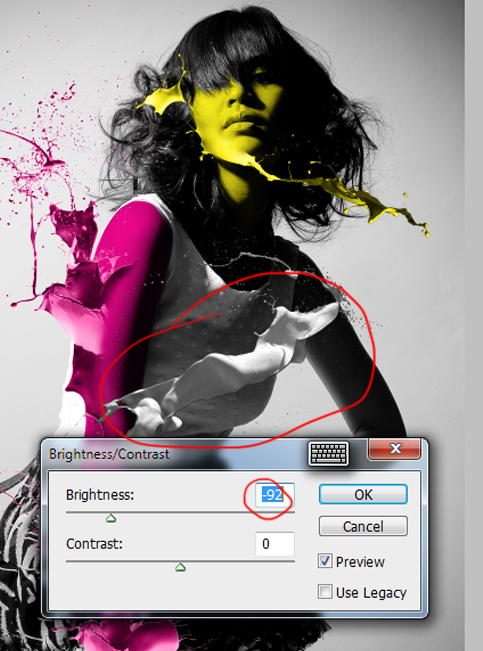
Now use the “paint toss no.7“ for the clothes. we need to adjust the brightness of the paint for about -92 to blend in with the clothes (Image>adjustment>Brightness/Contrast).
Lets add some flat black paint toss in the part of the hair. I used “paint toss no.9“

Then go to Layer>Layer Style>Color Overlay then choose the color “Black”.
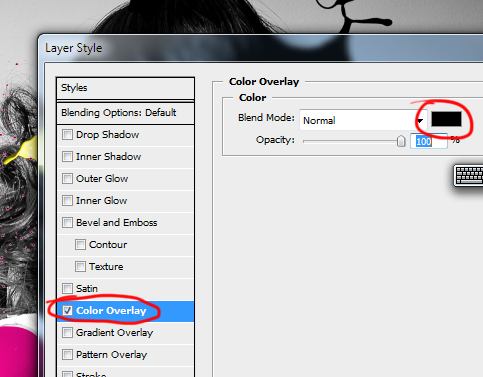
Erase some parts, using vector mask or simply use the Eraser tool. I just preferred erasing parts using vector mask so I can revert in back at anytime.
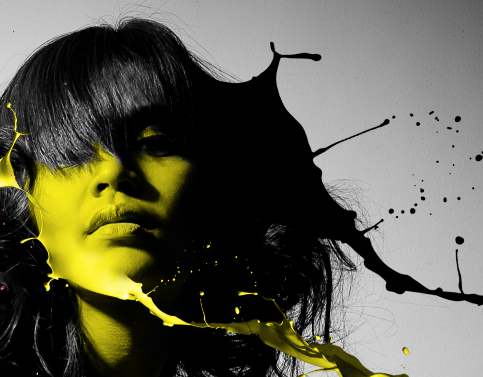
So here is the result so far:
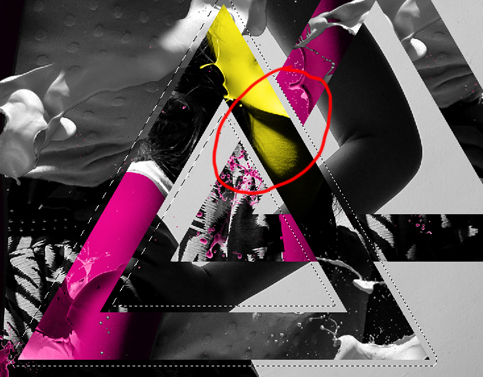
Part 4: Adding Shape Cut-Outs
Now let’s add some shape cut-outs. To do this we must first select all the layers, duplicate them, then merge them into one.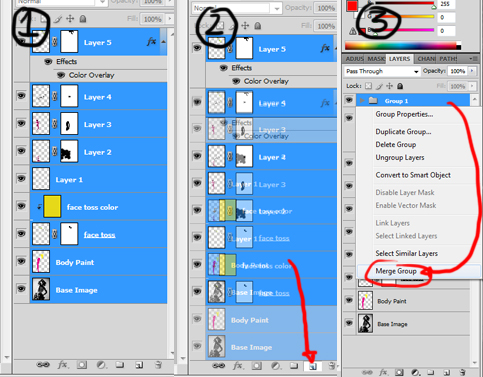
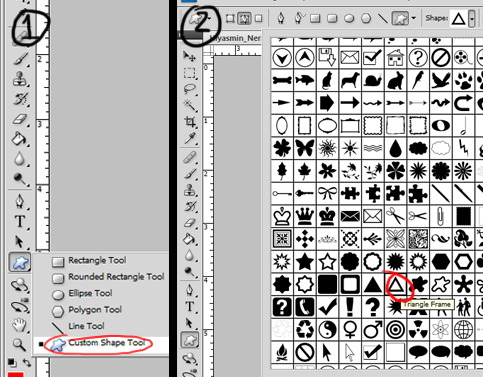
Go to Custom Shape tool and select the outlined triangle shown below:
Then while holding shift, create a triangle, you can move your triangle
by using “path selection tool (A). Feel free to position your triangle wherever you want.

Then press Ctrl+Enter , then press Ctrl+j to duplicate, then move it to the right, then press Ctrl+D to deselect.
Do another triangle from the merged layer using the same steps and overlap it to the first triangle.

Then lets interlocked the two triangles, first while holding ctrl key, click the left triangle, a marching ant should appear. then go to Select>modify>expand then set it to 15px. then you should have a result similar below:
After that, select the right triangle layer, using the eraser tool, erase the part shown below:
Using the same technique, do this again, but you will start on the right triangle, then vice versa.
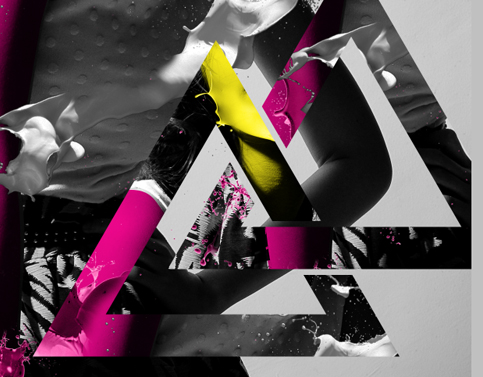
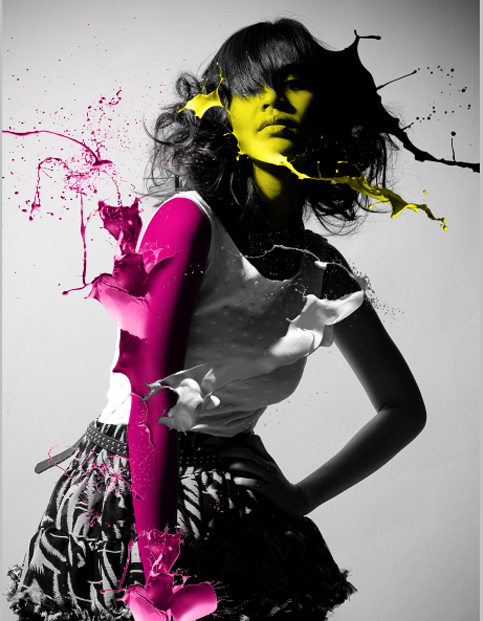
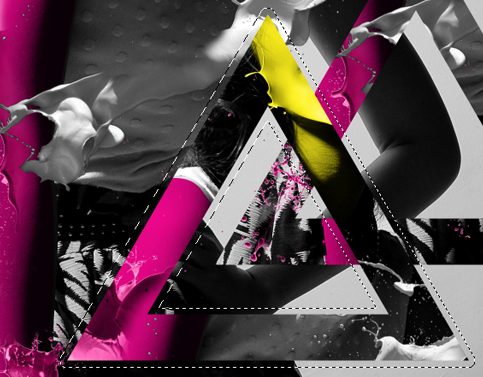
So here is what we have so far:
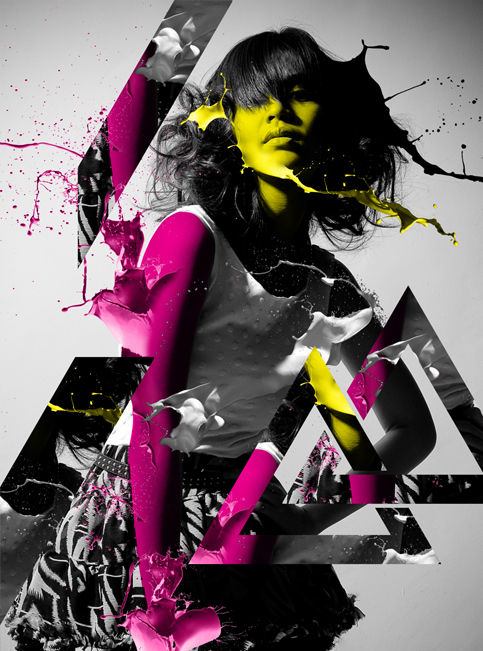
To finish things up, I just add some additional shapes using the same technique:
How to Create a Painting Effect – Photoshop Tutorial
How to Create a Painting Effect – Photoshop Tutorial

Step 1
Start by creating a new canvas of 600×400 (or any sizes you think fit) in Photoshop. Create a new layer, call it "Layer 1" and place the photo we downloaded earlier inside.
Step 2
In this step, we’ll first turn it ito a black and white photo. You can use any technique, but we are going to make use of the Hue/Saturation.Look for Hue/Saturation under Adjustments palette (Windows > Adjustment). Decrease its Saturation value to -100. A "Hue/Saturation 1" layer will then be added to your Layers palette.

Under the Color Balance’s Adjustment palette, switch Tone to Shadows and the following values:
- Cyan/Red: -59
- Magenta/Green: -100
- Yellow/Blue: -92
- Cyan/Red: -5
- Magenta/Green: -1
- Yellow/Blue: -50

Let’s call our new marged layer "Girl"

Step 3
Create a new layer with command Ctrl + Shift + N, fill it with white color with command Ctrl + Backspace. Move it bottom so it stays below the "Girl layer"Double click "Girl" layer to bring up the Layer Style dialog. Under the Blend If: section, look for the white triangular of This Layer:, hold the Alt key, and drag the white triangular towards the left until you reach the number 191/255.

Step 4
Hit Ctrl + Shift + N to create a new layer under "Girl" layer, fill it up with white color with command Ctrl + Backspace. Make sure the "Girl" layer is selected, hit Ctrl + J seven times to create seven new copies. Turn all Girl copy X layers off by clicking on the eye icon on the left of Layers palette.This leaves us with the original "Girl" layer. With it selected, do a Motion Blur (Filter > Blue > Motion Blur) the follwing values for:
- Angle: -22
- Distance: 484.
- Brush Details: 1
- Shadow Intensity: 0
- Texture: 3

Step 5
Moving up the Layers palette, look for the "Girl Copy", click on its eye icon to make it visible. Apply Motion Blur (Filter > Blur > Motion Blur) with the following values:- Angle: 22
- Distance: 247
Now, let’s give it a little hand-sketching feel. With "Girl Copy" later still selected, go into transformation mode with command Ctrl + T. Rotate it 90 degree CW, hit Enter/Return to confirm its transformation.
Give it a little Sheer effect (Filter > Distort > Shear) as showned in the image below, and then rotate it back to 90 degree CCW.


- Size: 150px
- Hardness: 0%
- Opacity: 30%

Step 6
Select "Girl Copy 2" layer, click the eye icon to make it visible. Get Sprayed Strokes (Filter > Brush Stroke > Sprayed Strokes) and set the following values:- Stroke Length: 20
- Spray Radius: 20
- Stoke Direction: Right Diagonal
- Direction Balance: 100
- Stroke Length: 50
- Sharpness: 10
Click OK to return to the canvas, select Gaussian Blur (Filter > Blur > Gaussian Blur) and give it a Radius value of 0.8px. Name this later "Dark Strokes" and set its blending mode to Hard light.

Step 7
Select "Girl Copy 3" layer, click eye icon making visible. Give it a Crosshatch (Filter > Brush Stokes > Crosshatch) with the following values:- Stroke Lenght: 50
- Sharpness: 14
- Strength: 3

Step 8
Yeap, you guessed it. Open up "Girl copy 4". Change its layer Opacity to 85%. Now, with "Girl copy 4" selected, hold the Alt key and click Add layer mask on the bottom of Layers palette. This allows us to add layer mask but hiding it at the same time.Get the Brush tool with the command B, and select the following values:
- Size: 150px
- Hardness: 0%
- Opacity: 20%


Step 9
Next, we go to "Girls copy 5" layer. Double click the layer to bring up Layer Style dialog, change Blend Mode to Color Burn.Again with the later selected, hold the Alt key and click Add layer mask button. Our aim here is to make the face and body darker so we grab the Brush tool with command B and repeately painting on those parts until you get result like the image below.

Step 10
Now we want to add some edges on it. Select the "Girl copy 6" layer, click on its eye icon to make it visible.Look for filter effect Glowing Edges (Filter > Stylize > Glowing Edges), set the following values:
- Edge Width: 1
- Edge Brightness: 20
- Smoothness: 10
- Brightness: 150
- Contrast: 100
Name this layer "Edges".

Step 11
Moving on, turn on "Girl Copy 7" layer. Our goal here is to get some wet brush the shoulder, we’ll do something similar to what we did in Step 5.Call up Motion Blur (Filter > Blur Motion Blur), set the following values:
- Angle: 0
- Distance: 600px
Hold Alt key and click Add Layer mask, and paint some White Color with Brush B tool over the shoulder.

Step 12
Now we’d like to enhance the texture effect for this art. Download Paper texture v5 by Bashcorpo, pull it inside our working PSD file and fit it on top of our layer. Hit Ctrl + Shift + U to Desaturate it, and change the layer’s Blending Mode to Darker Color.Now, because the texture image is actually bigger than our image, you can move it around to see which part of the texture fits best.

Step 13
It’d will be nice to give the image some Sin City effect. Let’s go ahead and add some red color for the glasses. To do it, go to Adjustments palette (Windows > Adjustments) and click on the Hue/Saturation button. A "Hue/Saturation 1" layer will then be created. Check the Colorize checkbox, and the following values:- Hue: 0
- Saturation: 20
- Lightness: 0

- Size: 80px
- Opacity: 30%.

Step 14
We are almost done! Now if you are unsatisfied with any of the effects, feel free to go down each of the layers and give it some final touch-ups with Brush B tool. Remember, White’s to reveal, Black’s to hide.We hope you get a similar effect like the image below.


